Learning Objectives
After completing this lesson, you will be able to:
- Execute a complete 24-hour pre-production checklist integrating lighting, camera, audio, and content.
- Execute a 30-minute setup checklist covering equipment, settings, lighting, framing, audio, and room tone.
- Execute a 5-minute pre-recording checklist including sync point creation and the opening question.
- Explain why systematic checklists free cognitive resources for the interview itself.
- Customize the provided templates for your specific equipment and environment.
Core Content
Every item on these checklists connects to a principle from Lessons 1-6. Parenthetical lesson references tell you where each skill was taught.
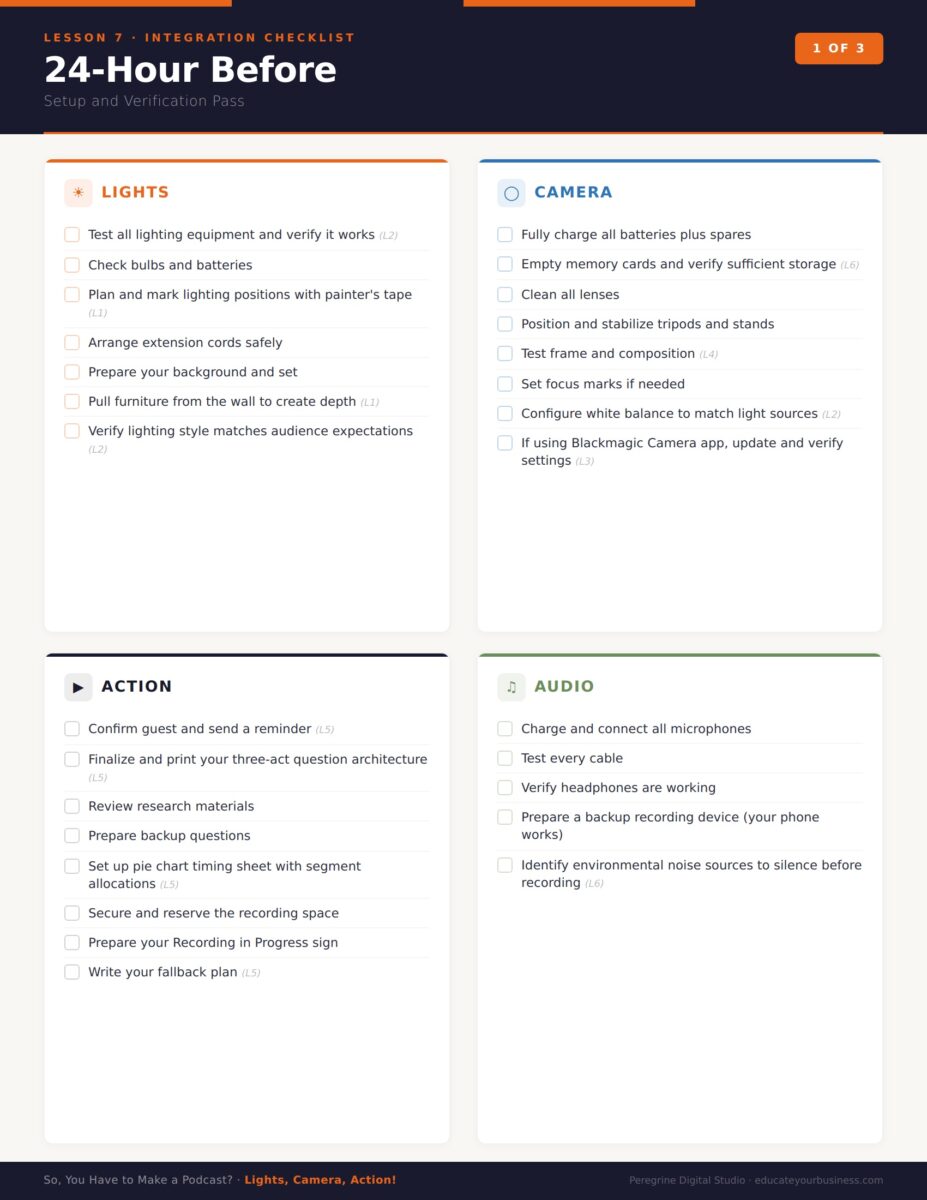
The 24-Hour Before Checklist
LIGHTS
- Test all lighting equipment and verify it works (L2)
- Check bulbs and batteries
- Plan and mark lighting positions with painter’s tape (L1 Tip)
- Prepare background and set; pull furniture from wall for depth (L1)
- Verify lighting style matches audience expectations (L2)
CAMERA
- Fully charge all batteries plus spares
- Empty memory cards and verify storage space (L5 Fallback)
- Clean all lenses
- Position and stabilize tripods
- If using Blackmagic Camera app: update, verify settings, enable grid (L3)
- Configure white balance for your light sources (L2)
ACTION
- Confirm guest and send reminder (L5 Guest Timeline)
- Finalize and print three-act question architecture (L5)
- Review research materials and prepare backup questions
- Set up pie chart timing sheet with segment allocations (L5)
- Secure and reserve the space; prepare Recording in Progress sign
- Write fallback plan: camera fails, guest cancels, storage full (L5)
AUDIO
- Charge and connect all microphones
- Test every cable connection (L6)
- Verify headphones are working
- Prepare backup recording device (phone) (L5 Fallback)
- Identify environmental noise sources to silence before recording (L6)
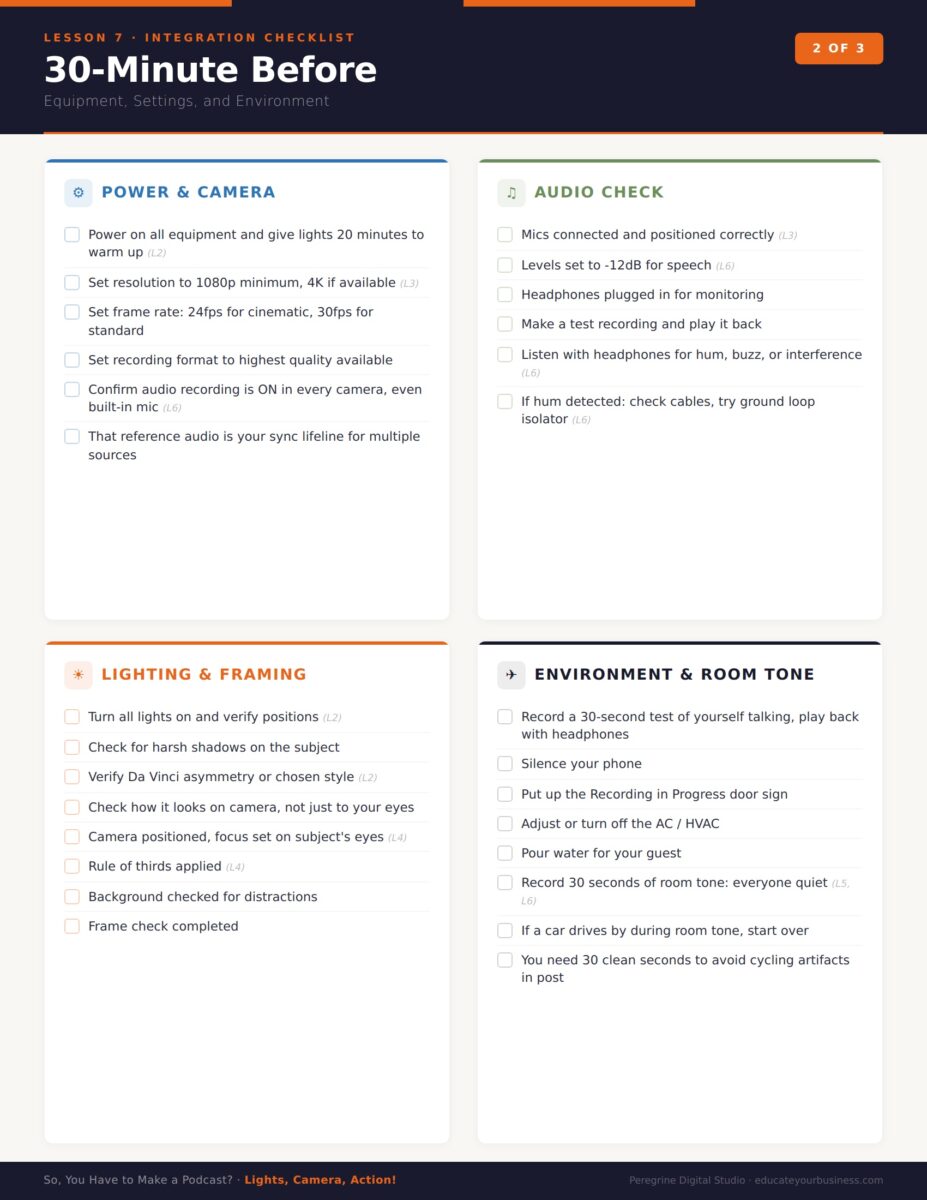
The 30-Minute Before Checklist
POWER AND SETTINGS
- Power on all equipment; give lights 20 min to warm up
- Camera: 1080p min (4K if available), 24fps or 30fps, highest quality format
- Confirm audio recording ON in every camera, including built-in mic (L6 Reference Audio)
AUDIO SETUP
- Connect mics, set levels at -12 dB for speech (L6)
- Plug in headphones, make test recording
- Listen back with eyes closed (L6 Graduate Student Tip)
LIGHTING TEST
- All lights on; Face Check for harsh shadows (L2)
- Adjust for chosen style: Da Vinci, conversational, or flat (L2)
- Verify on camera, not just to your eyes (L2)
FRAME AND FOCUS
- Position camera; focus on subject’s eye position (L4)
- Rule of Thirds applied; background checked (L4)
- If shooting 4K for crop: verify wide frame captures both positions (L4)
TEST RECORDING
- Record 30 seconds of yourself in the guest’s position
- Play back on camera; listen with headphones; verify all quality
ENVIRONMENT AND ROOM TONE
- Silence phone, post door sign, adjust/kill AC, pour water for guest
- Record 30 seconds of room tone. Everyone quiet. Restart if noise intrudes (L6)
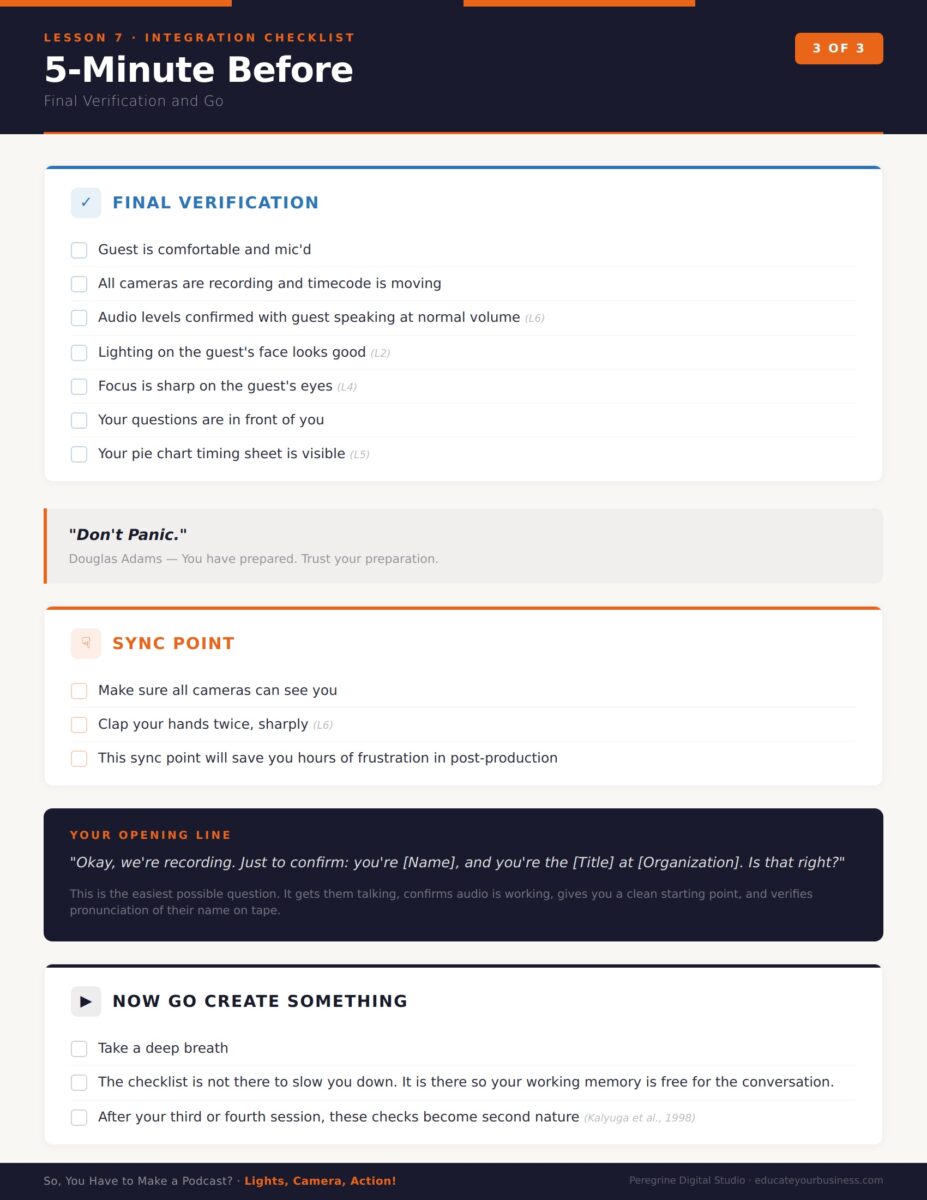
The 5-Minute Before Checklist
GUEST READY
- Guest comfortable and seated; mic attached correctly (L3)
- Guest walked through set and interview arc (L5 Pre-Interview)
- Guest told to look at you, not the cameras
TECHNICAL VERIFY
- All cameras recording; timecode moving on each device
- Audio levels confirmed with guest speaking at normal volume
- Lighting correct on guest’s face; focus sharp on guest’s eyes
- Backup recording device running
YOUR READY
- Questions in front of you; pie chart timing visible (L5)
- Deep breath taken
SYNC POINT
- Stand where all cameras see you; clap hands twice, sharply (L6)
OPENING LINE
“Okay, we are recording. Just to confirm, you are [name], and you are the [title] at [organization], is that right?”
Gets them talking. Confirms audio. Provides a clean start. Verifies name pronunciation on tape.
| Scenario: The Second Recording Session It is your second time recording. You pull out the laminated checklists. The 24-hour pass takes 45 minutes instead of two hours. The 30-minute pass goes faster because you remember where everything goes. The 5-minute pass feels almost automatic. You clap for sync without being reminded. You ask the opening question naturally. Something has shifted. The checklists are not constraining you. They are freeing you. Your attention is on your guest, not on your gear. That is the goal. |
| Graduate Student Tip Customize these checklists for your setup. If you are at Scenario 1, half the camera items do not apply. If you have a permanent space, environment items simplify each time. Cross out what does not apply. Add items specific to your space (the buzzing outlet, the afternoon window glare). The best checklist is one you actually use. |
Hands-On Exercise: The Dry Run
- Work through the 24-hour checklist. Set up your space completely. Time yourself.
- Next day, work through the 30-minute checklist. Power on, verify, test, record room tone. Time yourself.
- Sit in the guest’s chair. Have someone run the 5-minute checklist on you. Let them clap for sync and ask the opening question.
- Play back the test recording. Evaluate lighting, framing, audio, focus.
- Revise your checklists based on what you learned. This revised version is your production tool.
Self-Check Questions
At what point do these checklists become unnecessary?
What are the three time-based checklists and the purpose of each?
Why should you record room tone during the 30-minute checklist, not during the interview?
What is the purpose of the hand clap at the 5-minute mark?
Why is the opening confirmation question an effective way to begin?
How do systematic checklists reduce cognitive load during recording?